This post contains affiliate links.
If you are looking for a way to setup a compact seed starting station, even if you have limited space, you’ve come to the right spot! I am going to share my tips and tricks, and give you some resource recommendations that have worked really well for us. My focus for this article is on the seed starting station itself. If you want to learn more about actually growing the seeds, and my recommendations and how-to tips for that process, I’ll be posting a separate article on that soon.
So let’s jump into it – HOW do you setup a compact seed starting station indoors? And what if you don’t have a lot of space? Is it really still worth the effort? I am here to tell you YES, it absolutely is. And you don’t need a lot of space to do it. You just need to maximize what you do have. At the time of writing this post, I do all my seed starting on two shelves of an 18″ x 24″ rolling cart. The cart actually has 4 shelves (it’s about 6 feet high) but we have two dogs and a cat and have to keep tasty leafy greens out of easy reach. So, I’m “stuck” with only 6 square feet of growing space!

So … 6 square feet of seed starting space, for our raised bed garden that has about 120 square feet of growing space?! Doesn’t seem like much does it? Sure, more would be convenient. But, I make it work! And we actually get by pretty well 🙂
Getting Started
Let’s jump into what you need for this compact seed starting station, and how to put it all together!
The primary foundation for this new setup should be a shelf or set of shelves. You’ll also need some grow lights, and a way to connect them above each shelf. Consider the length of the grow lights as well as the size of your growing trays when deciding on what size shelves to use. For us, with our limited space, we knew we would be using 2 foot grow lights (instead of the more common 4 foot). The rest of our decisions revolved around this dimension.
The three core components to this indoor grow station are:
- Rack or set of shelves
- Grow lights
- Access to power outlet (or a power strip you can mount to the side of the rack)
Below I’ll tell you about the brands we’ve chosen to use for our own seed starting station, but this is just to give you some ideas. Find what works for you, and go from there!
Rack
For the rack, we are using commercial grade steel wire shelving on wheels. This makes it easy to move around if needed. We purchased the Seville Classics Wire Shelving on Amazon. We’ve been using it nonstop for about two years with no issues and have been really happy with it. This shelving comes in a few different sizes, so you have some options! The shelves are also variable so you can adjust them to the best height for your setup.
Grow Lights
Choosing the correct type of lights for your seed starting station is critical. Without the correct type of full spectrum light, and enough of it, your plants won’t grow well at all. Did you know plants require different wavelengths of light for different stages of growth? This is why a full spectrum bulb is so critical. Without it, they may end up gangly, or with yellowing/discolored leaves. They also may not be able to grow very big, or for very long, before needing to move to the “real” sunlight to flourish.
To effectively start seeds indoors, you want to be able to grow them productively for at least 6-8 weeks, and sometimes longer. This requires the right type of light that will encourage those little plant babies to grow. After doing quite a bit of research, we settled on a full spectrum fluorescent tube – T5 High Output fluorescent tubes to be exact.
Extra Resources on Grow Lights
In case you would like to perform your own research on grow lights, I’m including links below to a few great resource articles about choosing an effective grow light for your indoor plant growing station:
- Gardener’s Path (jump to the “How to Choose the Best Grow Light for Your Indoor Garden” section)
- Garden Myths – LED Grow Lights
- Mother Earth News – Best Grow Lights for Starting Seeds Indoors
Grow Lights We Ended Up Using
As I mentioned, we needed some lights that were two foot in length due to our space constraints. We found a great fixture kit that includes the ballast and T5 bulb we were wanting. It also allows you to link multiple fixtures together (up to eight) so you can get a nice spread of light across your shelves. The kit we ended up purchasing was the Sunblaster NanoTech T5 grow lights. It comes in a few different lengths, so you could fit it to your own rack specifications. (Read our full review on the Sunblaster grow lights.) The bulbs have lasted us over a year, with near daily use at 12-16 hours a day. We recently replaced our first bulb 15 months after purchase, and have had no issues during that time! T5 replacement bulbs are also readily available for this system.
For our 18″ x 24″ shelves, we have two lights per shelf, and that has worked pretty well. Three may be slightly better in giving a nice even spread of light. However, we haven’t had any critical issues that have forced us to upgrade. So we’ve stuck with our two light setup, through four growing seasons, and lots of microgreens in between!
To attach the lights to the rack:
- Cut 2 lengths of chain per light – I’d recommend ~10 inches if using a rack like ours. You can get chain from a local hardware store. Most will even cut it to length for you if you’d like!
- 2 to 4 S-hooks per light. You can use the S-hook to attached the chain to the loop at the top of the light, and then to also attached the chain to the shelf above. Depending on your chain you may also be able to open the last link and just attached it directly to the shelf. This will eliminate the need for a second S-hook.


Smart Power Strip
The last item you need for the seed starting station is a power source. If you are close enough to an outlet to just plug the lights in directly, that will certainly work. When starting seeds, you want at least 12 (and up to 16) hours of light a day. One thing we added to our setup that made the timing more convenient was a “smart” power strip mounted to the side of the rack.
It is really useful to be able to set a schedule and never have to remember to turn the lights on or off! And as a bonus, we don’t have a bunch of cords hanging everywhere (a pet peeve of mine ;)). The other great thing about this power strip is that you can manage it from your phone with an app. It allows you to set schedules and control the on/off functionality straight from your phone. This has been something I’ve really appreciated with our setup.
We’ve been using the Kasa smart power strip for over a year now on our grow station. We’ve been really happy with it, and the app is quite user friendly and easy to navigate as well.
Optional Heating Pad
Depending on the type of seedlings you plan to start, you may not need a heating pad, as long as the ambient temperature in your home is at least in the 70s. (Most seeds need at least this temp to germinate – your seed packets should tell you!) However, in my experience a heating pad is basically required to get eggplant seeds to germinate. And it really helps speed along pepper and chile seeds as well.
I just use a basic $20-$30 heating pad from the drug store. You will want to be sure it has a “low” setting, and that if it has an auto-off, you can override that. To use it, I set it on top of the grow rack shelf, under the seedling trays. I leave it on low 24/7 until the seeds start to sprout and then remove it. Simple! And it really is a life saver for certain types of seeds.
What about the rest?
That wraps up the basics for putting together a compact seed starting station! At minimum, you can do this in an 18″ x 24″ footprint. I bet pretty much anyone can carve that amount of space out in their home! If you’d like to learn more about how I actually start the seeds, what my growing process looks like, and some recommendations on trays, dirt, timing, etc, take a look at this how-to article dedicated to the full process of starting seeds indoors.
Resources mentioned in this article

Seville Classics Wire Shelving
Buy Now →
Sunblaster Nanotech T5 Grow Lights
Buy Now →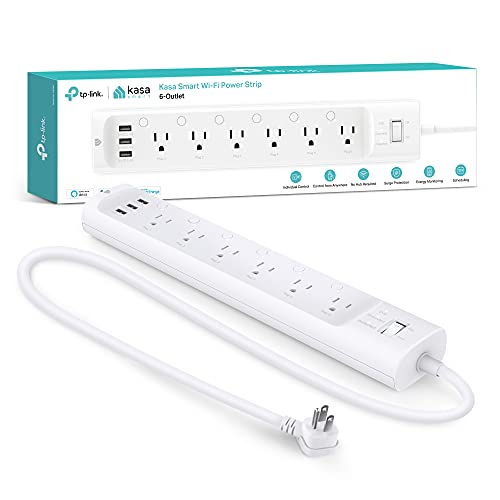 Buy Now →


Leave a Reply