This post contains affiliate links.
If you own a Traeger and you’ve never tried smoked pork shoulder (aka pork butt), you have to try it! Maybe even next weekend. Seriously, it’s not worth putting off any longer. Smoked pork shoulder is one of our go-to’s on the Traeger. We make a big batch, shred it, eat it for a few days, and freeze the rest (vacuum sealed into single or double portion sizes). The frozen pork is a super quick and easy week night meal when you have nothing else planned. And it is always yummy! We like to thaw it out, then cook it in a skillet until the edges get crispy. It is great topping a salad, but you can also use it for nachos, tacos, burritos, (even lettuce wrapped) and probably more I haven’t thought of!
If you’re new to the concept of smokers, or have never heard of a Traeger at all, I’ve written a summary post to cover all the basics and help you on your way! You can check that out here.
Looking for other recipes/methods for smoking your favorite type of meat? Check out some of these other posts!
Background
We stumbled on an even better cooking method last time we made smoked pork shoulder, so this time around we decided to dial it in, making notes so we could be sure to repeat again. And now I’m here to share with YOU what we learned so you can repeat it as well!
Quick note – The pork shoulder is typically split into two cuts – the “pork butt” or “boston butt” and the “picnic shoulder.” The butt is higher up, rectangular in shape, and usually more marbled. The picnic shoulder is triangular in shape, less marbled, and often includes the skin-on (good for a roast!). For pulled pork, use pork shoulder butt if at all possible. The marbling plays an important role in how moist and tender your meat turns out. Anyways, since the naming conventions can be varied, it is good to know what you are looking for!
Many recipes you find for smoked pork shoulder will have you cook it the whole time at 225/250°F, until it reaches at least an internal temperature of 190°F. This can take anywhere from 6-12+ hours depending on the size of the cut of meat you are working with, if it is bone-in, etc.
However, we were up against a deadline last time we made pulled pork, where we needed it to be done in time for a dinner we were having with some friends. Actually, with the couple hours of resting, we needed it to be finished mid-afternoon. From our previous experience cooking an ~10 pound pork shoulder, we knew that even if we started it early in the morning, we would be lucky to have it finish in time. It wouldn’t be uncommon for it to take at least 12 hours at 225°F.
So, we decided to be bold and try something new. We set the Traeger to 180°F, put the pork on about midnight, and let it smoke all night – turning it up to 225°F mid-morning to finish. And it worked beautifully! It was probably the most moist pork shoulder we had made yet. We decided this definitely needed to become our go-to method. So that is what we are sharing with you here!
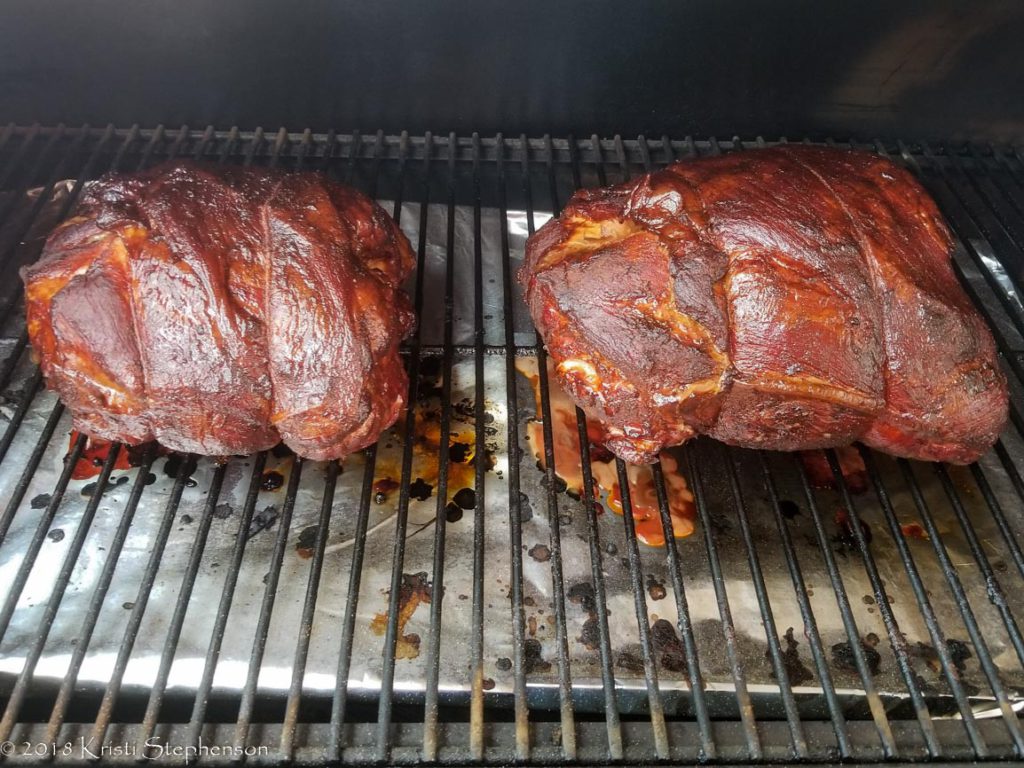
As a side note on size and where to buy, we often get our pork shoulder at Costco, where you get two boneless cuts totaling 15-20 pounds, so 8-10 pounds each. Bone-in is most ideal, but not always as practical. And these boneless shoulders turned out spectacular, if I do say so!
Temperature and Timing
Plan for at least 16 hours for cooking. Start the pork at 180°F the night before and let it go for about 12 hours, or until the internal temp reaches at least 160°F, but anywhere up to 180°F (it just depends on how much patience you have :)). Once you get to ~160°F the temp will get stuck for a while… don’t worry! This is normal! The connective tissues are breaking down. It will start to climb again soon, and you will be back on track.
For our ~8 pound shoulders we smoked recently, it took about 11.5 hours to get to 160°F internal. At that point we had to turn the temp up to 225°F and start our ribs on the same grill, so the shoulder went up to 225°F at this point too. It took another 4 hours at 225°F to hit that internal temp of 205°F we were going for.
Once the shoulders reached 205°F internal, we pulled them off, wrapped them in towels, and let them sit for 2.5 hours. Normally, we would put them in a cooler to insulate them and keep the juices in while they cool. However, we are in Phoenix and it is July and 110°F+ outside. So we actually just wrapped them well and left them sitting out in the shade. And believe me, they stayed warm until we pulled them 2.5 hours later! Let the meat rest anywhere from 1-3 hours. Again, this depends on how much patience you have, or if you are feeding a hungry and impatient crowd.
What about the wood we used? Well, Hubby got creative and made his own blend – equal parts of apple, maple, and pecan. I can tell you it was yummy! And it smelled sooooo good while it was smoking! 🙂
In summary, for an 8 pound boneless pork shoulder, smoke at 180°F for 12 hours (or until internal temp reads 160-180°F), turn up heat to 225°F, and smoke an additional 4 hours (until internal temp reads 200-210°F). Let rest 1-3 hours. Pull. Eat!
Pork Prep – Before/During/After
The prep required for a pork shoulder is pretty simple. The flavor and moisture really all comes from the low and slow cooking. BUT there are a few things you can do to make it just that much better…
Before the Pork Shoulder Goes on the Smoker
Before you put the pork on the smoker, rub it down with yellow mustard, and then sprinkle your favorite dry rub generously all over. Our favorite that we use all the time is Magic Dust Seasoning, created by BBQ legend Mike Mills.

Also note – if your pork shoulder is boneless, you may want to tie it up to keep it all together in a nice tight bundle while cooking.
Optional – inject the pork with an injection liquid to infuse more flavor and moisture deep inside. We used this Pork Injection Marinade that we found on The Spruce Eats, and it was certainly yummy! But we have been just as happy with smoked pork shoulder that we didn’t inject. So if you don’t have the extra time or equipment for this, don’t stress. It will turn out yummy anyways 🙂


While the Pork Shoulder is on the Smoker
While the pork is smoking at 180°F, spritz every 30 minutes with apple juice. If you are setting the smoke to go overnight, no worries – just start the spritzing as soon as you get up in the morning.
Once you turn the heat up to 225°F, wrap the pork in foil and put a little apple juice in the bottom of the foil for some added moisture. As it cooks more juices will collect – reserve these for use at the end.
After the Pork Shoulder Comes off the Smoker
Once the pork shoulder reaches an internal temperature of 205°F, take it off the grill. Wrap it in foil and a couple towels. You can even put it wrapped in an empty cooler to keep it warm if you plan to let it rest for a while. After resting for at least one hour, it is time to shred! We like to use these bear paws to do the job – they are incredibly efficient to use! As you shred, incorporate some of the reserved juices for an extra moisture boost. You can also sprinkle some of the dry rub into the meat to make sure the seasoning gets evenly dispersed. Basically, taste it and add a little of this and that until you are satisfied with the finished product. This is YOUR pulled pork, so make it to your liking!
To Serve the Pulled Pork
Hubby made an amazing Carolina BBQ Sauce to serve with the pork (see: Big Daddy’s Carolina Style BBQ Sauce). We also put out all the fixings for a really tasty pulled pork sandwich: small soft rolls, coleslaw, pickled red onions, Carolina BBQ Sauce. YUM! What a feast we had!
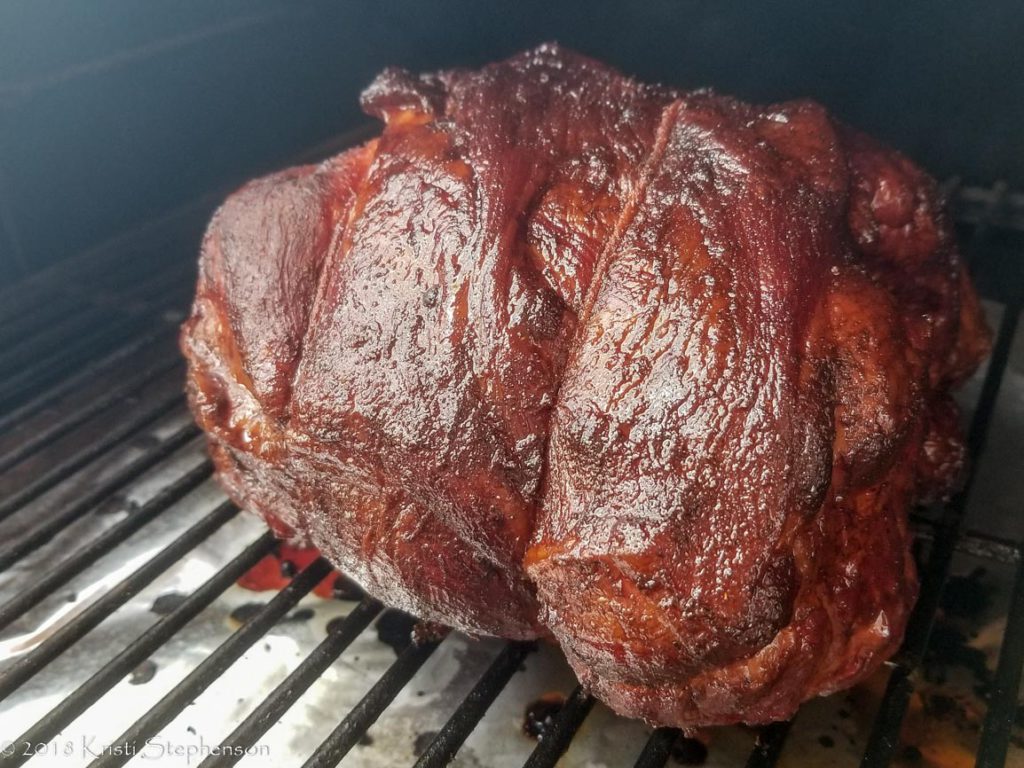
I HOPE that after reading this post and seeing these pictures you are convinced that you, too, have to give this smoked pork shoulder a try!


Ingredients
- 8 pound boneless pork shoulder
- Yellow mustard
- Your favorite dry rub (try Magic Dust Seasoning if you need a suggestion)
- 8 oz apple juice
- Injection marinade (optional – try this pork injection marinade if you need a suggestion)
Instructions
Start the Traeger
- Start the Traeger according to manufacturer's instructions.
- Once it starts smoking, set the temperature to 180°F and let come to temperature (about 10 minutes).
Prep the pork shoulder before placing on the Traeger
- Let the pork shoulder sit out at room temperature for about 30 minutes before you prep it to start smoking.
- Rub the pork shoulder down with yellow mustard until well coated.
- Sprinkle the dry rub all over all sides of the pork shoulder, patting into the mustard to help it stick on.
- If needed, tie the shoulder together with cooking twine. This is especially helpful when using a boneless pork shoulder.
- If using an injection marinade, do your injection now, following a patchwork pattern across the pork shoulder.
- Set the pork shoulder on the Traeger and start cooking.
- Put some apple juice into a spray bottle, and while smoking the pork shoulder at 180°F, spritz every 30 minutes or so with the juice.
Smoke the pork shoulder
- Smoke at 180°F for ~12 hours, until the meat reaches an internal temperature of at least 160°F, up to 180°F.
- Raise the temperature on the Trager to 225°F.
- Wrap the pork shoulder in foil, and pour a little apple juice into the bottom of the foil wrap.
- Let the pork shoulder continue smoke until the internal temperature reaches 205°F, about 4 hours.
Let the pork shoulder rest
- Pull the pork shoulder off the Trager, and reserve the juices.
- Re-seal the foil around the pork shoulder, wrap in towels, and place somewhere that the temperature will be relatively insulated for several hours (inside a cooler, inside the oven with it off, etc).
- Let sit for 1-3 hours.
Shred, season, serve
- Put the shoulder into a large pan, and shred.
- Add reserved juices, and additional dry rub to taste.


Jamie
OK, like to think I’m an old pro can’t remember when i started smoking pork butt, but I’ve certainly always looked every time to see if there is something new and exciting to try and it has been a journey. Your method is still the tried and true I have tried to do every time. The only thing I would add to your “perfect” method is: time of year smoking – winter vs summer, humid vs dry, and careful with bone in where you take the temp. Everyone should always listen to Kristi. You will find success, from start to finish! Temps are your only indicators. If your temps are high or low are your only worries. Every thing else is personal taste or preference. Honestly 203 after 12 – 14 hours is the magic number, and then the “Resting Period” of wrapped and finishing in a cooler or oven is the secret to success. Thank you Kristi!
rich
Any concerns with the roast being in the food danger zone between 40-140 for more than 4 hours when you set Traeger to 180?
Alicia West
Thank you so much for posting this recipe. I have been working on a 10 lb, bone-in, pork butt since last night around 6:30 pm, using this method. It took about 14 hours to get to 160; then I put the roast in a foil pan, added liquid, then covered it with foil and smoked it at 225 until the thermometer went in without resistance, about 202 degrees. The bark is so beautiful and I am so happy to have a new, overnight, method for pork butt. Thank you so much.
Kristi
You are welcome Alicia! I’m so happy hear you loved it! And thank you for sharing your timing, I love to get other people’s experience with the recipe shared here as tips for others.
David Caswell
I like your method of cooking. I have adapted it a bit for kalua pig. Instead of mustard i just use pink Himalayan salt. A nice coating is all it takes. Let it sit with the salt on it at room temp for an hour. Then put it on the smoker ( i have a camp chef) at midnight at 180. In the morning i leave it (dont spritz at all) til the temp says 160. Then i wrap it and put in a roasting pan and put it back on smoker on low smoke with temp set at 225. when it says 205 on temp. I pull it and let it sit on indirect heat low in my reg 5 burner grill (temp at 130) for 2 hours. Then we pull and eat….
Kristi
Thank you for sharing David! This sounds delicious 🙂
Justin Dodson
I’m doing this right now. Thanks for the 180 tip. Both butts from my Costco pack are on the Traeger with Meat Church seasoned salt all over after yellow mustard application. I’ll wake and continue to spritz all day tomorrow until a great meal.
Kristi
Sounds great! I’m sure the meal was delicious! 🙂
Stephanie
Am I spraying every 30 minutes for the whole 12 hours? I was kind of hoping to do some of this overnight, that’s 16 hours total time. I only got two days off. ( ;
Kristi
Hi Stephanie – good question! We’ve definitely done it overnight. We just spray every 30 minutes until we go to bed, and then pick it up again in the morning until it is ready to wrap. As much as you con do will add a nice crust to the meat, but it’s not essential to keep it up the whole time 🙂 Good luck, I am sure it will turn out delicious!
Steve Matthews
I am using a traeger and smoking a 4 lb. pork shoulder. Can I get everything done in 8 hrs to start eating?
Kristi
Hi Steve,
Not at the temperatures recommended in my post. You would want to cook at a higher temp, and since you are not doing “low and slow” it may not turn out quite as tender. I’d recommend 225F for the full time. Since it is a smaller shoulder, you may see it finish in about 8 hours – these things are difficult to predict and you do have to “roll with it” a little. That would be my recommendation to try though!
-Kristi
Stephen Dillabough
I am doing 2x5ibs shoulder pork should i put them both on at 180 for 12 hours smoke trader bump it up to 225 f
Kristi
Hi Stephen, you can definitely smoke them both at 180F for the first 12 hours and then bump up to 225F til finished. If you want to speed up the process, just start at 225F, or bump it to that temp sooner than the 12 hours.
Michelle
Do you put it fat side down or fat side up
Kristi
Hi Michelle – We did ours fat side up, but there are schools of thought supporting either way. Fat side up with the method we use turns out tasty though, that is for sure!
-Kristi
Jeff
Doing a pork butt right now for the guys at the job site (never go anywhere without my smoker!) Started it last night and about to pull it off the smoker and into a cooler. Thanks for the tips- it looks amazing!
Kristi
That’s awesome Jeff! I’m sure you have some happy co-workers!